They say a picture is worth a thousand words. A doctored photo is worth at least that many in spreading disinformation and sowing the seeds of division. Fortunately Google has an easy and effective tool for debunking falsified photos.
Some considerations in debunking falsified photos:
Often when a doctored photo first appears results for the falsified photo dominate the top results. While Google claims to be addressing this issue, it is still a problem. Keep digging beyond the first page and be the person to find the original photo or check back to find results when others have done the debunking research.
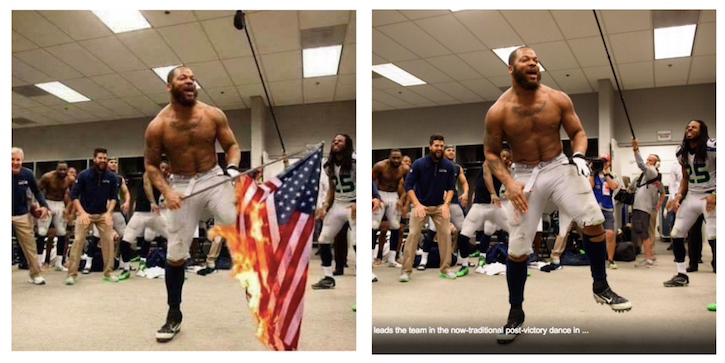
If you post a debunking of a falsified photo create a new image in which both the original and the fake photos are side by side. In social media separate images may end up independently inserted into others’ feeds and have the potential to propagate the image intended you intended to debunk.
Reverse image search is a helpful tool for unmasking bots and trolls on social media. They often steal profile pictures from stock photo sites and real people’s social media profiles. Google image search usually quickly reveals the original source.
How To Reverse Google Image Search
For those who prefer video demonstrations:
For those who prefer written instructions:
Step 1: Open a new Google search page
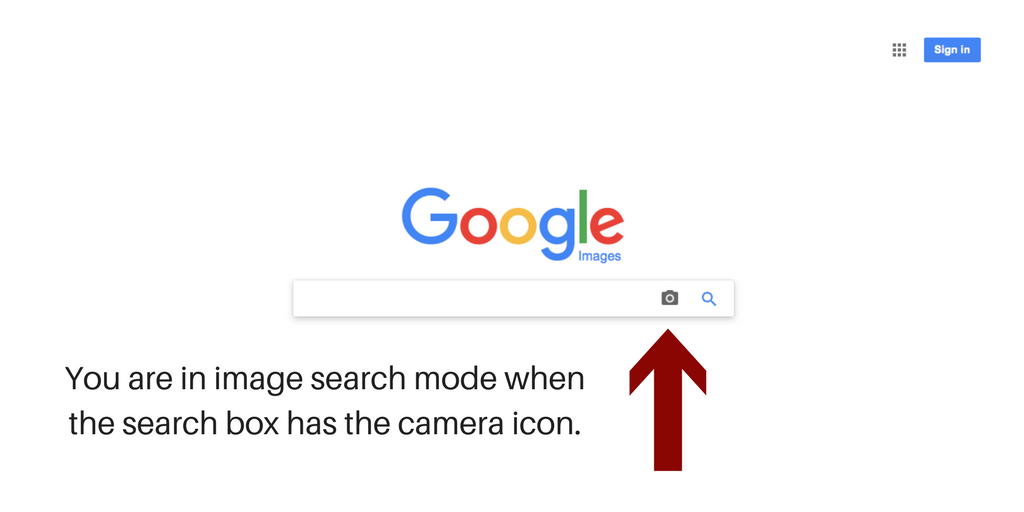
Step 2: Click on the word “Images” in the upper right corner

You will get this screen which looks much the same as a regular Google search except there is now a camera icon in the search box.
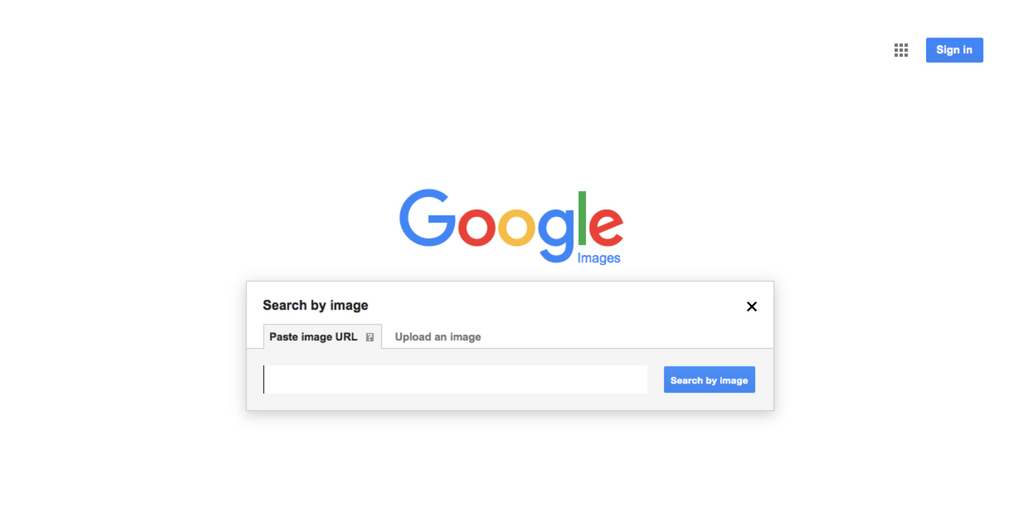
Step 3: Click the camera icon and upload the photo in question
You will have two options for uploading an image into the search. The default option is to paste a URL link. The other is to upload an image. If you found the image in an article the URL option may produce good results. If you discovered the image on social media or a friend sent it to you in email photo upload is the better option.
In order to use the photo upload option you will need to save it to your device. This varies by device and can usually be done by right clicking on the image and selecting “save image”. If you are not sure how to save an image on your device Google “save image on [device]”. A screen shot of the image works as well.
Step 4: Start sleuthing
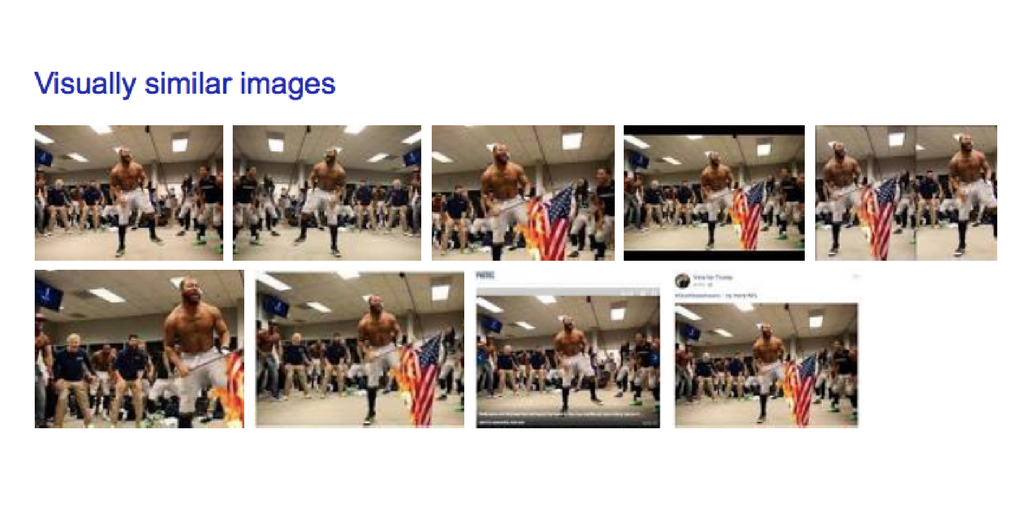
Google will deliver articles in which it finds the image as well as selection of “visually similar images”. In this collection of images you will often find samples of the original photo along with examples of the doctored photo. Clicking on the photos will take you to the website where they are posted.